Module 2: Breathing with
Cannulas
Types of cannulas
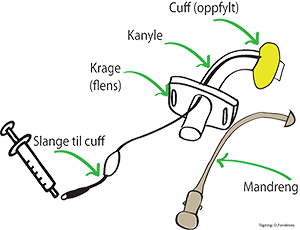
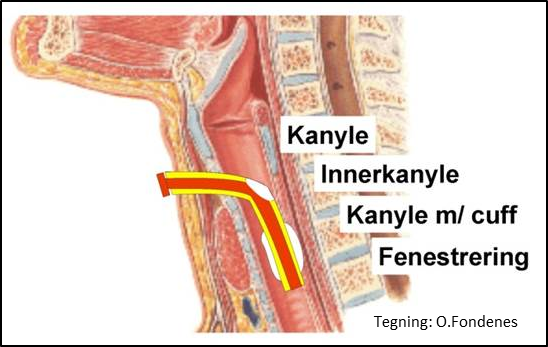
Tracheostomy cannulas are made of plastic, silicon or silver. Their features, curvature and size vary. Cannulas are designed with or without an inner cannula, cuff (circular-shaped balloon around the cannula) and fenestration (window). Customised cannulas can be made for users when necessary due to complications or unusual anatomy. A standard cannula is suitable for most users. Cannulas are held in place by a neckband.
The patient’s airways and functional requirements will determine which cannula to choose. Furthermore, the routines and experience of those in charge of the treatment and the experiences of the patient along the way will also play a role. The type of cannula can also be changed as required. For safety reasons, the user must always have an extra cannula and inner cannula (if the user has one) and a ventilation bag at home.
The diameter of the point on the cannulas for connection to the ventilator tube and ventilation bag has been standardised.
Inner cannulas
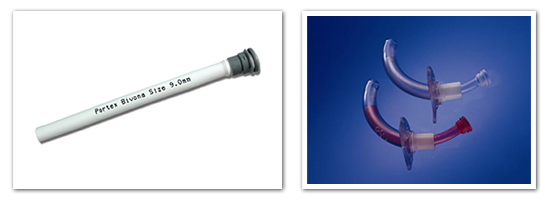
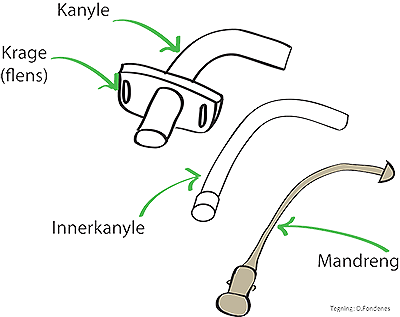
Tracheostomy cannulas are designed with and without an inner cannula. An inner cannula is a cannula that can be placed inside the tracheostomy cannula. The inner cannula can be quickly removed if the user develops stagnated secretions or clots of mucus in the cannula. However, the inner diameter will be reduced, which can affect ventilation. Inner cannulas are made of either plastic or silicon.
Changing cannulas and inner cannulas
For hygiene and safety reasons, it is necessary to change cannulas regularly. Frequent changing can reduce the risk of infection, formation of granulated tissue and cannula occlusion.
Recommended: Change cannulas every 30th day or more frequently, for example, with suspected blockage of the cannula, especially if blockage is still suspected after trying other methods to open the airways (suction, cough assist machine, changing of the inner cannula, if applicable).
Cleaning cannulas
To prevent infection it is recommended to regularly remove the cannula (inner and outer) for cleaning. Be prepared for the procedure, inform the patient and make sure the required equipment is in place when cleaning starts.
http://www.helse-bergen.no/no/OmOss/Avdelinger/heimerespiratorbehandling/Sider/Trakeostomi.aspx
How to change an inner cannula
An example of how to change an inner cannula using a Bivona Tracheal Cannula TTS is found below.
Equipment
- Clean and non-sterile gloves.
- Changing set (forceps and cleaning sponges).
- Or cotton applicators + ointment.
- Mesh gauze
- Inner cannulas
- NaCl 9 mg/ml for washing the skin (or 1% Chlorhexidine).
- Tracheostomy tape with Velcro fastening.
- Waste bin
Preparation
- Gather the above equipment and have it close at hand.
- Inform the patient about the sequence of events.
- Position the patient in a way that allows him/her to stretch out and bend the neck at the same time.
Execution
- Thoroughly wash your hands with soap under running water or alternatively use an approved anti-bacterial soap.
- Put on clean gloves.
- Remove the inner cannula from the cannula: hold the cannula shield, grab the ring on the inner cannula and pull it out of the locked position.
- Insert a new inner cannula and press it down ‘to lock’.
- Loosen the cannula tape and remove the old mesh gauze whilst holding the cannula in place.
- Inspect the tracheostomy opening:
- Signs of infection: soreness, pus, swelling, discoloured mucus.
- Granulation tissue (‘wild meat’): can be dabbed with a silver nitrate stick (or it can be removed by a doctor). It can also be dabbed with Nelex, which is the same as Albothyl concentrate 36% vaginal solution, 100 ml bottle.
- Bleeding
- Wash the skin around the cannula with applicators soaked in NaCl 9 mg/ml.
- (With infection: wash with Chlorhexidine 1% solution)
- Thoroughly dry the area around the stoma with gauze and forceps.
- A small amount of ointment, e.g., barrier cream or zinc ointment, can be applied to the stoma if there is redness/irritation.
- In the event of infection: apply antiseptic cream, Brulidine 0.15% or Cavilon barrier film (box of 25 x 1 ml with sponge).
- Place a new mesh gauze under the wings of the cannula.
- Attach the cannula tape. It must be possible to insert one or two fingers under the tape at the base of the neck. Replace the cannula tape as needed.
NB! Discard inner cannulas after one month of use.
Post-execution
- Put the equipment away.
- Discard used materials.
- Wash your hands.
The instructions are exemplified below.
http://www.helse-bergen.no/no/OmOss/Avdelinger/heimerespiratorbehandling/Sider/Trakeostomi.aspx
Cleaning an inner cannula
It is important to follow the inner cannula cleaning instructions to prevent infection.

- Wash the inner cannula with sterile saline solution. Use the cleaning brush for Bivona inner cannula (BICSWB, cannula brush, Bivona tracheostomy).
- Do not soak the inner cannula.
- Insert the cleaning brush into the inner cannula and twist it as you pull it out.
- Discard the brush after use.
- Check that the inner cannula is clean and free of dirt, If not, repeat the cleaning procedure with a new cleaning brush until the cannula is clean.
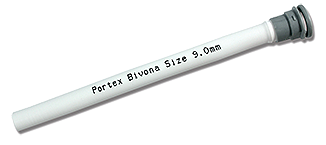
- Inspect the inner cannula for damage/kinks after cleaning. If damaged, discard and replace the cannula.
- Leave the inner cannula to air dry.
- Wrap it in sterile gauze.
NB! Discard inner cannulas after one month of use.
Post-execution
- Put the equipment away.
- Discard used materials.
- Wash your hands.
Recommended: Inner cannulas should be cleaned morning and evening. Outer cannulas are cleaned in connection with replacement, at least once per month. After cleaning, carefully inspect the cannula(s) for cracks and damage, and ensure that the shield has not loosened from the cannula.
http://www.helse-bergen.no/no/OmOss/Avdelinger/heimerespiratorbehandling/Sider/Trakeostomi.aspx